


Last Updated on 9월 17, 2021 by Jade(정현호)
Contents
- SEHA is "Standard Edition High Availability"
- Modify to /etc/hosts
- Configure to Oracle ASMlib
- OS Configuration Change
- Installation the 19c GRID
- Installation the Database S/W
- 19.9 GRID - Apply RU Patch
- DB S/W Copy to node 2 and DBCA
- Oracle S/W RU Patch
- Modify the srvctl - database
- Relocate the database resource
- Conclusion
- Reference
SEHA is "Standard Edition High Availability"
SEHA stands for "Standard Edition High Availability" and you can think of it as the SE version of RAC ONE NODE that is easiest to understand (there are differences).
한글포스팅은 여기 를 클릭해주세요
[This function is only available on Windows, Linux and Solaris.]
Of course, EE's RAC ONE NODE simply does not work in SE, but there are functional differences.
That part will be mentioned below.
Oracle's Standard Edition 2 (SE2) customers can benefit from Grid Infrastructure's high availability features and storage management solutions, such as Oracle Automatic Storage Management (ASM) and Oracle ASM Cluster File System (ACFS) for free.
Original ref :
Oracle’s Standard Edition 2 (SE2) customers thereby benefit from the high availability capabilities and storage management solutions that are already part of Oracle Grid Infrastructure,
such as Oracle Automatic Storage Management (ASM) and the Oracle ASM Cluster File System (ACFS), free of charge.
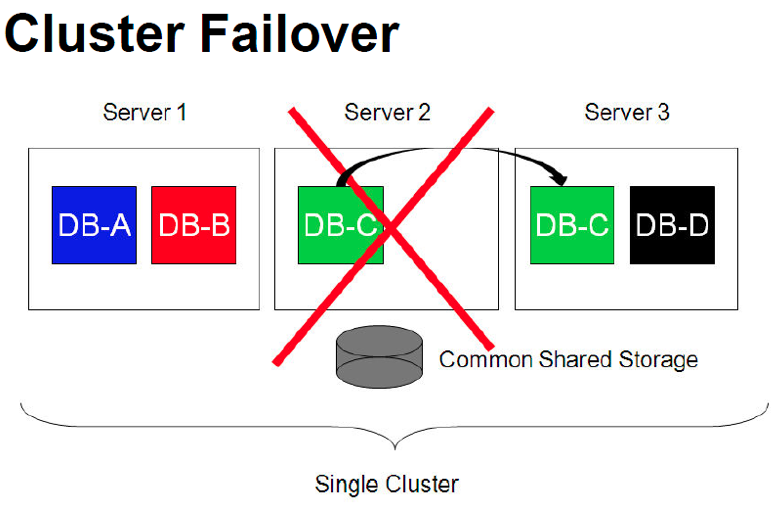
In a clustered environment, SEHA functionality does not include RAC database functionality, unlike RAC and RAC ONE NODE (see comparison below).
(There is no Global Cache or Global Enqueue, etc.)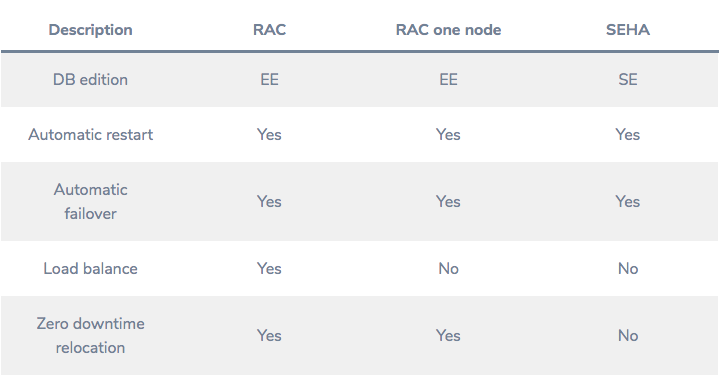
So, unlike RAC ONE NODE, SEHA does not run two instances at the same time no matter how short the time.
For reference, RAC ONE NODE runs simultaneously in a short time.
SEHA may shut down the previous instance before starting the instance on another node, and then start the instance on another node.
This concept is the same (similar to) as normal Vender Cluster or 3rd Party Cluster or Oracle Fail Safe on Windows.
# Test Environment
OS : Oracle Linux 7.8
Oracle/Grid Version : 19.9 (need to upgrade from the base version(19.3) via RU patch.)
Hostname : acs(node1) , acs2(node2)
Oracle SID : ORCL
/etc/host
public : acs , acs2
vip : acs-vip , acs2-vip
scan : acs-cluster-scan
interconnect : acs-priv , acs2-priv
Directory is
$ORACLE_BASE : /orace/base
$ORACLE_HOME : /oracle/db
$GRID_HOME : /oracle/grid
Installation order to
* Grid S/W install -> Database S/W Install -> DB S/W Copy to node2 -> Grid RU Patch
-> DBCA -> Database S/W RU Patch
* Before installing Grid, we will proceed after setting up the environment configuration in advance.
* When 19.9 RU was applied to ORACLE_HOME and DB was created, ORA-600 continued to occur, so RU was patched after DB creation for the test.
* The order can be changed according to the working method.
Modify to /etc/hosts
Modify to /etc/hosts (all nodes)
[root]# vi /etc/hosts
192.168.56.51 acs
192.168.56.52 acs2
192.168.56.53 acs-vip
192.168.56.54 acs2-vip
192.168.56.55 acs-cluster-scan
100.100.100.1 acs-priv
100.100.100.2 acs2-priv
Configure to Oracle ASMlib
Partition operation to disk.
* Only 1 disk is used as it is a test environment
* The added shared disk is /dev/sdd
# operation to only one node - Run as root user
[root]# fdisk /dev/sdd
Command (m for help): n
Partition type: P
p primary (0 primary, 0 extended, 4 free)
e extended
Select (default p): p
Partition number (1-4, default 1): [enter]
First sector (2048-143305919, default 2048): [enter]
Last sector, +sectors or +size{K,M,G} (2048-143305919, default 143305919): [enter]
Command (m for help): w
The partition table has been altered!
Calling ioctl() to re-read partition table.
Syncing disks.
# all nodes
[root]# partprobe
installation the asmlib package
Based on Oracle Linux, Redhat Kernel may require kmod-oracleasm.
# all nodes, Run as root use
[root]# yum install oracleasm-support oracleasmlib
[root]# rpm -Uvh https://download.oracle.com/otn_software/
asmlib/oracleasmlib-2.0.12-1.el7.x86_64.rpm
-> Newline for mobile, must be entered in one line for actual use.
[root]# /usr/sbin/oracleasm configure -I
<skip...>
Default user to own the driver interface []: oracle
Default group to own the driver interface []: dba
Start Oracle ASM library driver on boot (y/n) [n]: y
Scan for Oracle ASM disks on boot (y/n) [y]: y
Writing Oracle ASM library driver configuration: done
[root]# oracleasm init
# run on node 1
[root]# oracleasm createdisk ORADISK1 /dev/sdd1
# run on node 2
[root]# # oracleasm scandisks
# check to asm disk
[root]# oracleasm querydisk -p ORADISK1
Disk "ORADISK1" is a valid ASM disk
/dev/sdd1: LABEL="ORADISK1" TYPE="oracleasm"
OS Configuration Change
run on all nodes - vi /etc/sysctl.conf
net.core.rmem_max=4194304
net.core.rmem_default=262144
net.core.wmem_max=1048576
net.core.wmem_default=262144
fs.aio-max-nr = 1048576
fs.file-max = 6815744
run on all nodes - apply to change
[root]# sysctl -p
adding to /etc/security/limits.conf
# run on all nodes
oracle hard nofile 65536
oracle hard nproc 16384
oracle soft nproc 2047
oracle soft stack 10240
adding to NOZEROCONF=yes
# run on all nodes
[root]# vi /etc/sysconfig/network
NOZEROCONF=yes
=> adding
firewalld disable
# run on all nodes
systemctl stop firewalld
systemctl disable firewalld
systemctl status firewalld
systemctl stop iptables
systemctl disable iptables
systemctl status iptables
avahi-daemon disable
# run on all nodes
systemctl stop avahi-daemon
systemctl disable avahi-daemon
systemctl status avahi-daemon
Disable to Transparent Huge Pages
# run on all nodes
echo never > /sys/kernel/mm/transparent_hugepage/enabled
echo never > /sys/kernel/mm/transparent_hugepage/defrag
If the result is "never", then it was executed correctly.
# cat /sys/kernel/mm/transparent_hugepage/enabled
always madvise [never]
# cat /sys/kernel/mm/transparent_hugepage/defrag
always madvise [never]
See the blog post for more details
English translation is required.
resize to /dev/shm
[root]# mount -t tmpfs shmfs -o size=4g /dev/shm
modify to /dev/fstab
tmpfs /dev/shm tmpfs size=4g 0
Create oracle user's .bash_profile on server 2
created by referring to the .bash_profile of node 1'
ORACLE_SID is ORCL
* ALL nodes Oracle SID=ORCL
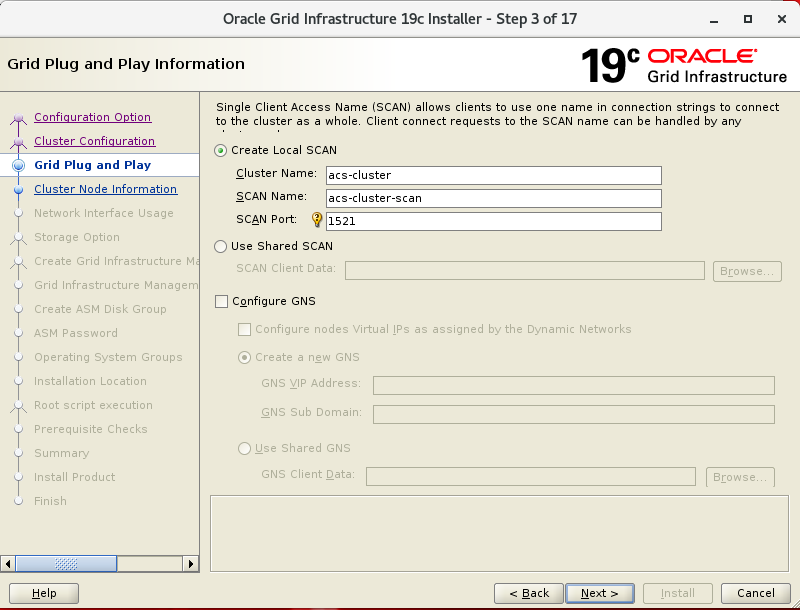
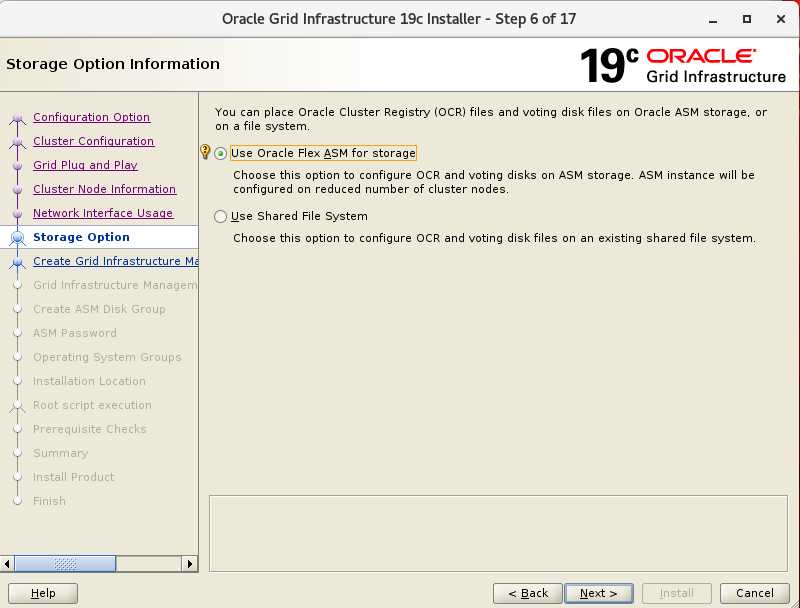
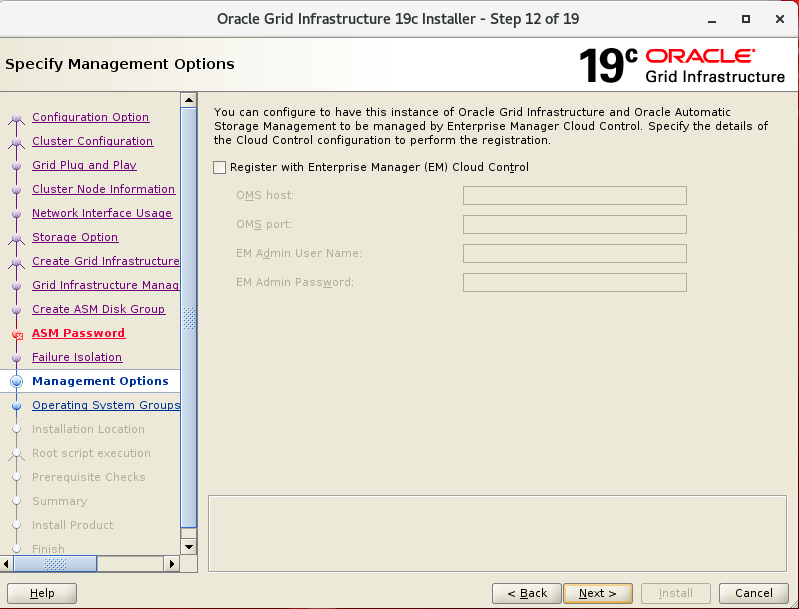
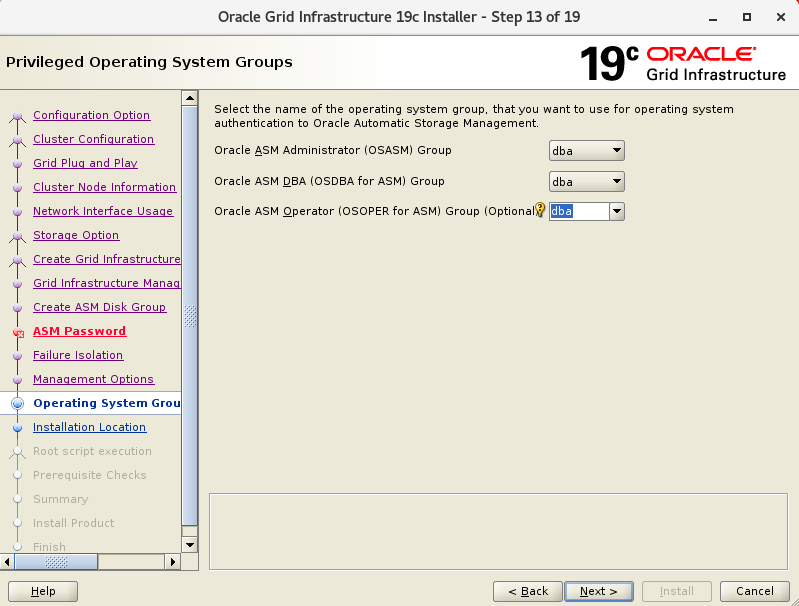
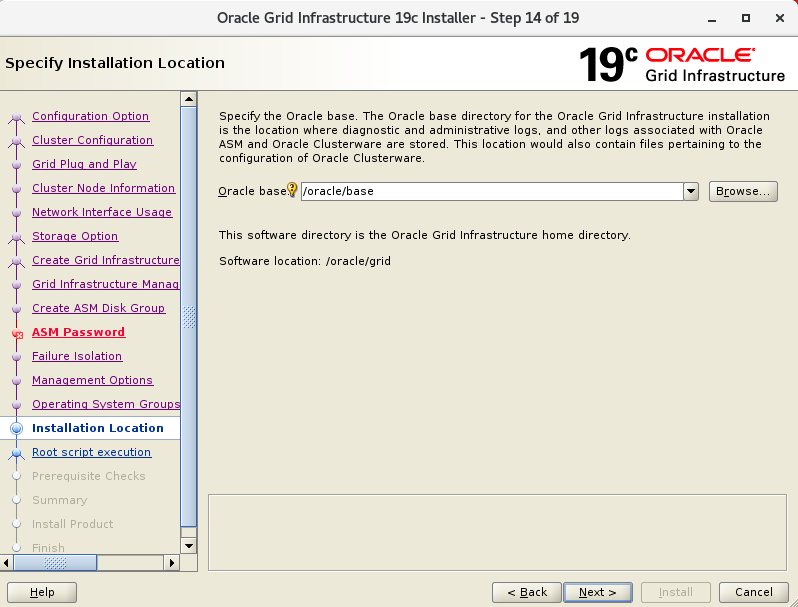
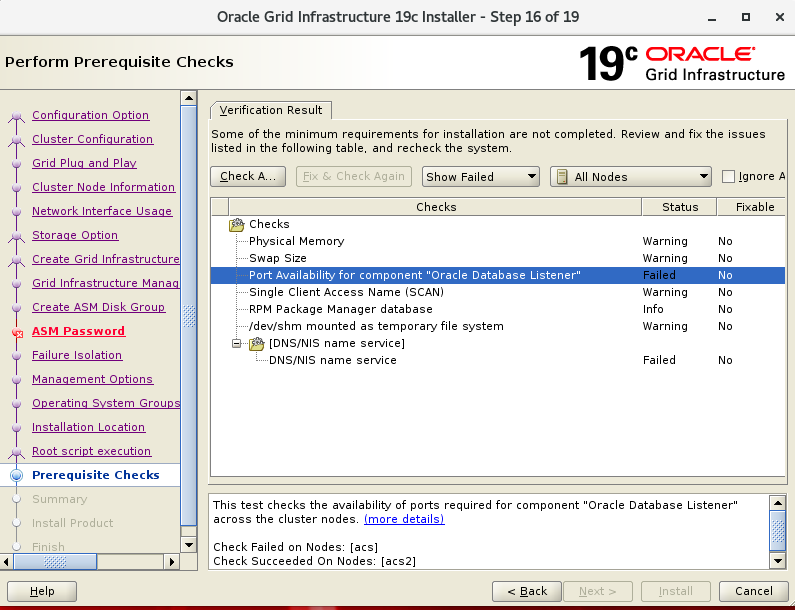
Installation the 19c GRID
* Installtion from Node1 to oracle or grid user
* During the test, only "oracle" users used.
* xserver is pre-configured and X11 Forwarding is possible.
* The image will only explain the necessary parts.
# install to cvuqdisk - run as root - node1
[root]# cd /oracle/grid/cv/rpm
[root]# export CVUQDISK_GRP=dba
[root]# rpm -ivh cvuqdisk-1.0.10-1.rpm
[root]# scp cvuqdisk-1.0.10-1.rpm acs2:~
# install to cvuqdisk - run as root - node2
[root]# export CVUQDISK_GRP=dba
[root]# rpm -ivh cvuqdisk-1.0.10-1.rpm
# run on node 1
[oracle]$ cd /oracle
[oracle]$ unzip LINUX.X64_193000_grid_home.zip -d grid
[oracle]$ cd /orace/grid
[oracle]$ ./gridSetup.sh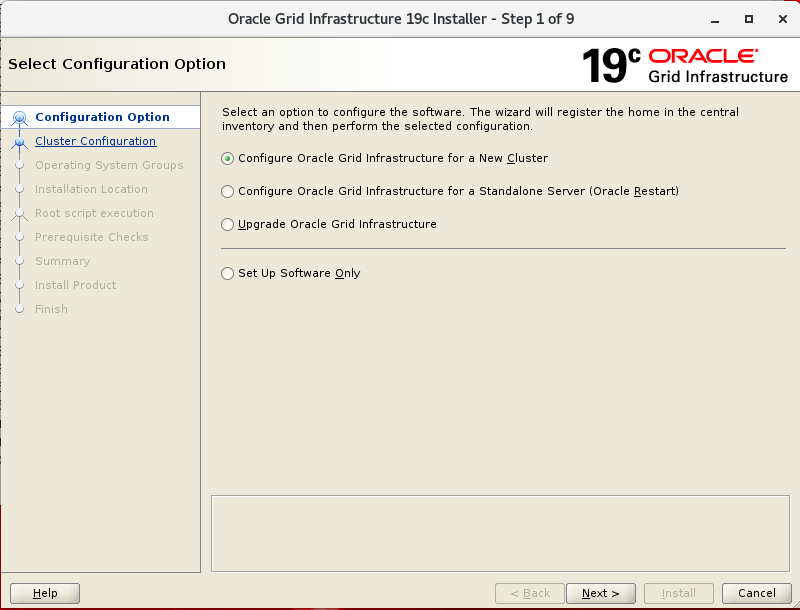
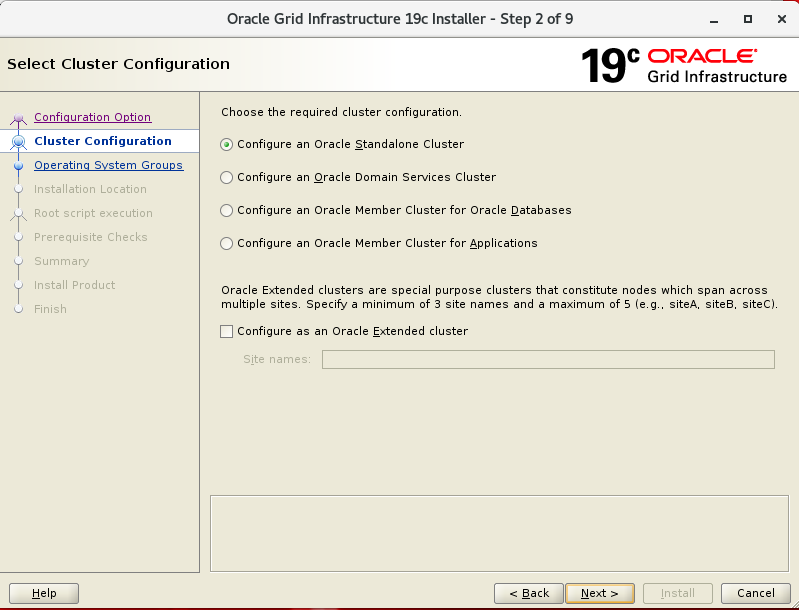
After setting up ssh authentication between nodes 1 and 2 through Setup at the bottom and proceed to click to Next button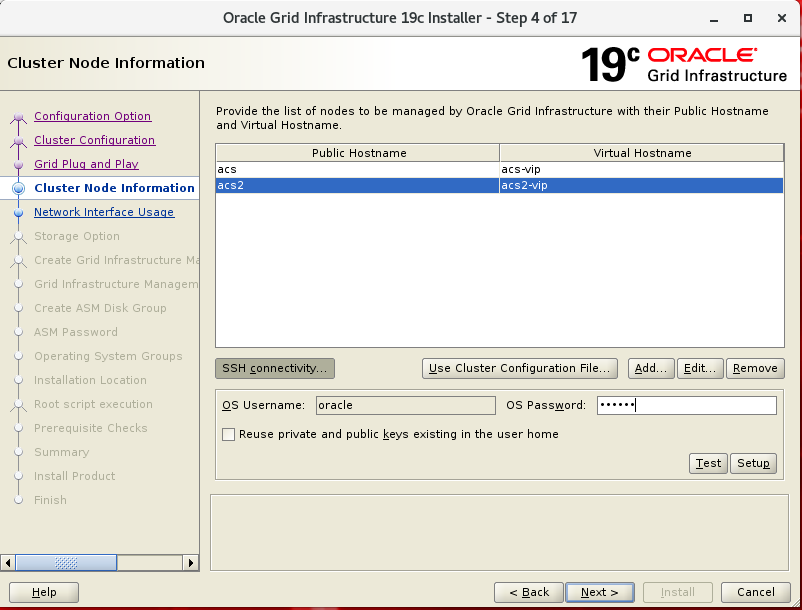
From 19c, GIMR is changed back to selection, so I will not select it during testing.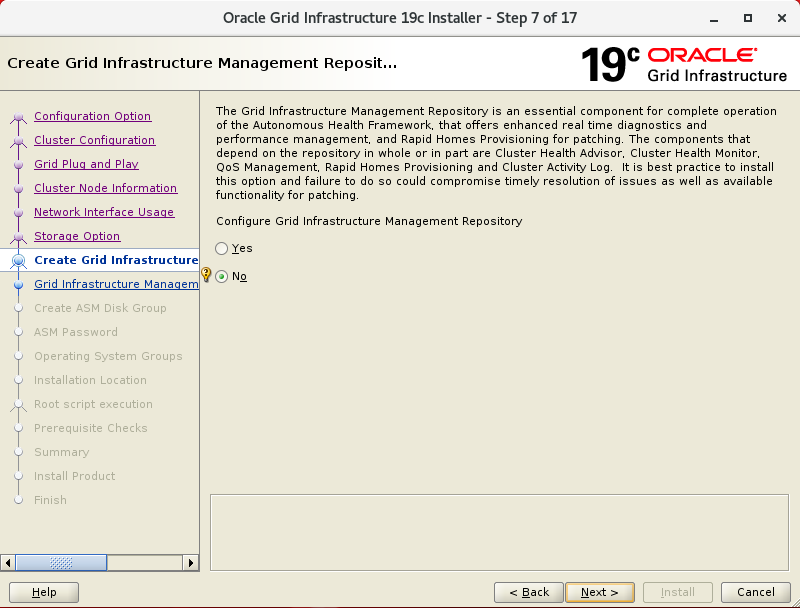
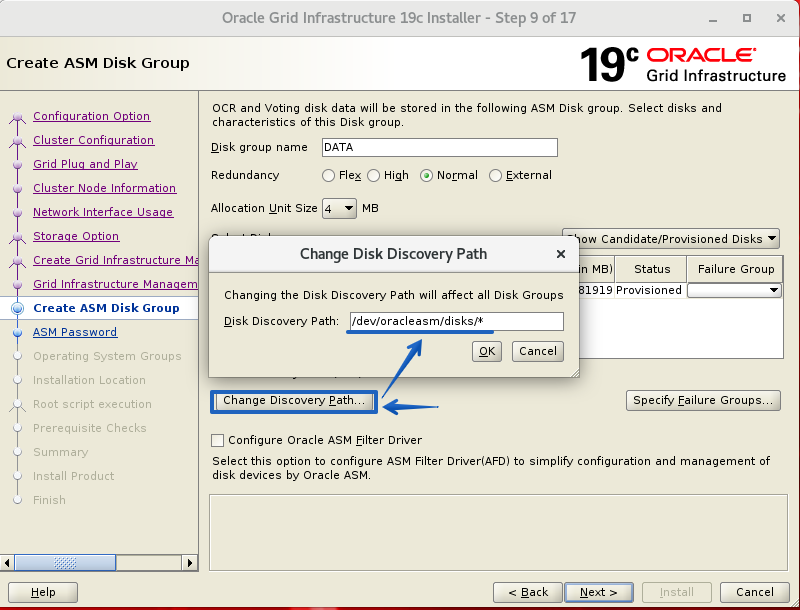
Diskgroup : DATA , Redundancy : External 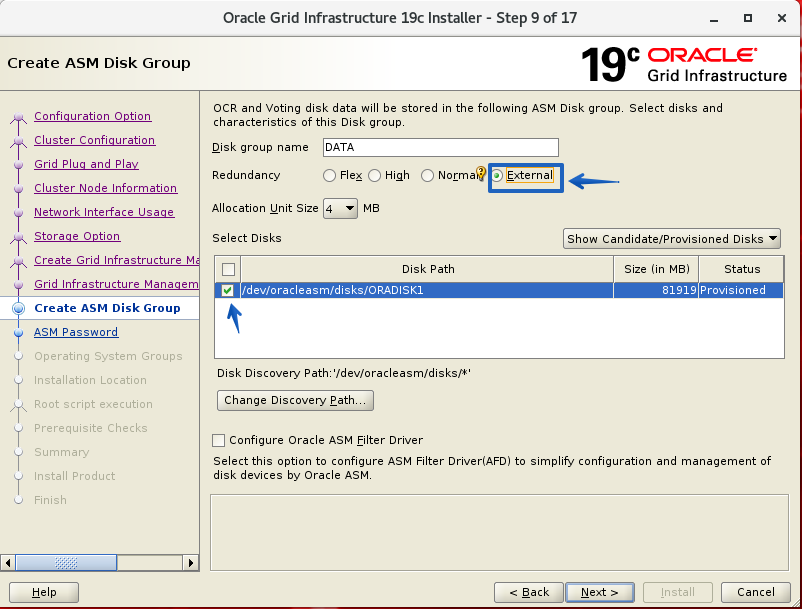
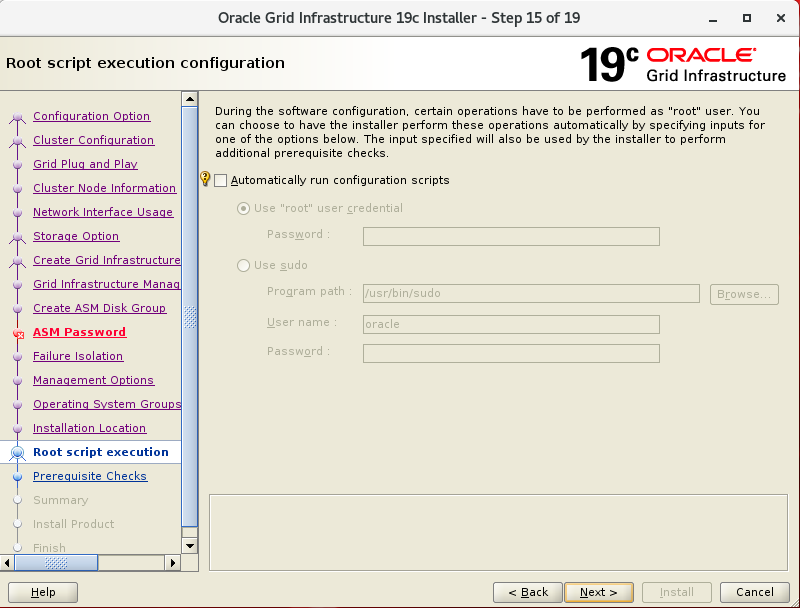
Execute the $GRID_HOME/root.sh script as the root user in the order of 1,2.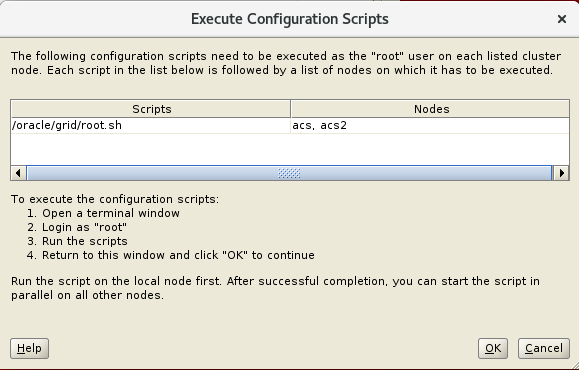
If installation is complete, add .bash_profile - all nodes
export GRID_HOME=/oracle/grid
export PATH=$PATH:$GRID_HOME/bin
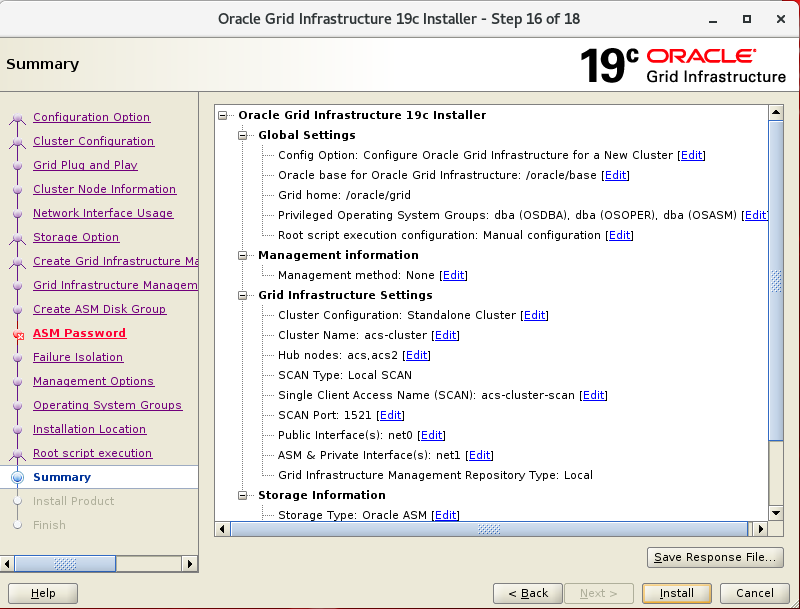
Grid has been installed
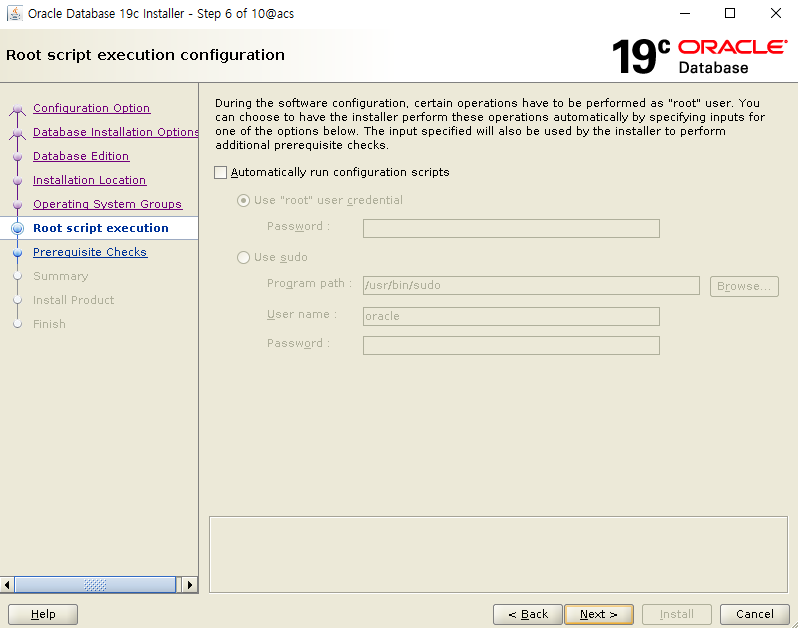
Installation the Database S/W
Create the directory where db will be installed and change ownership
# run as root ( all nodes )
[root]# cd /oracle
[root]# mkdir db
[root]# chown oracle:dba db
unzip file and execution to runInstaller - node 1
= run as oracle
[oracle]$ unzip LINUX.X64_193000_db_home.zip -d /oracle/db
[oracle]$ ./runInstaller
Setup software only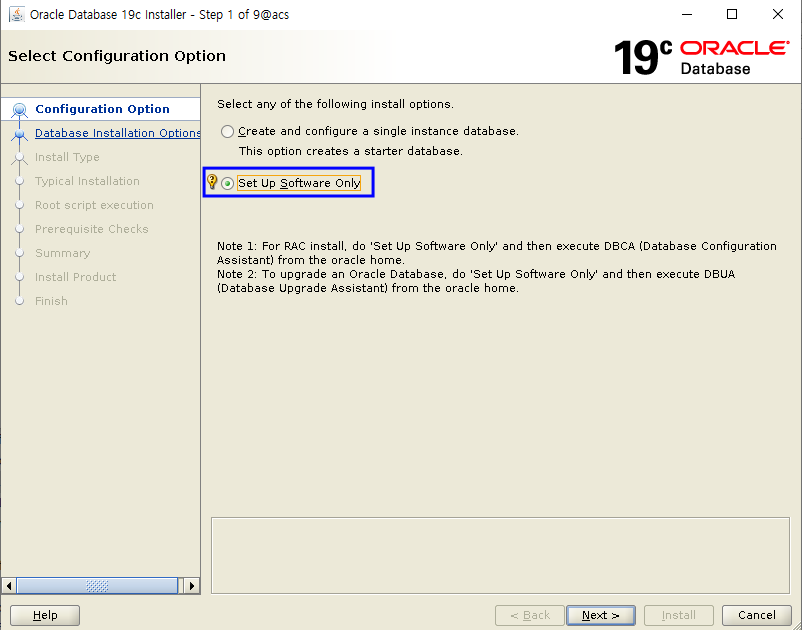
Single Instance database installation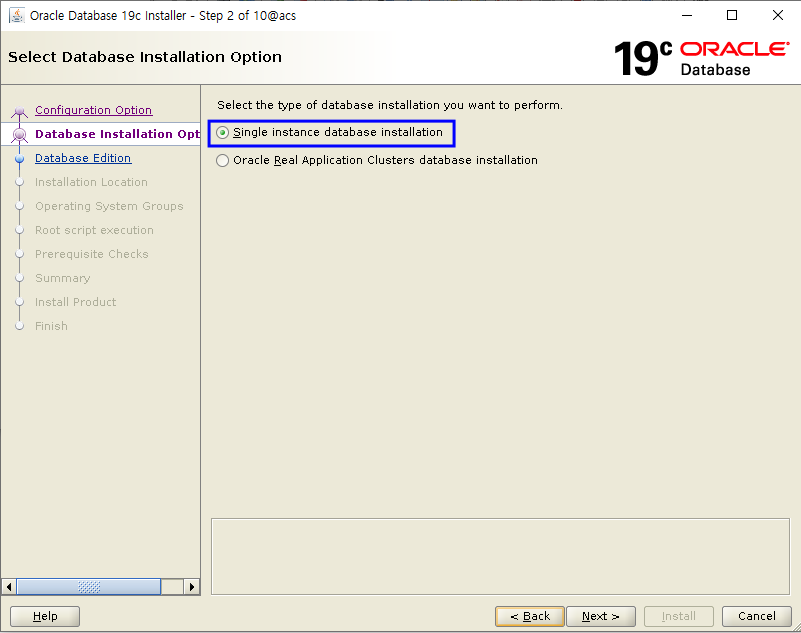
Standard Edition 2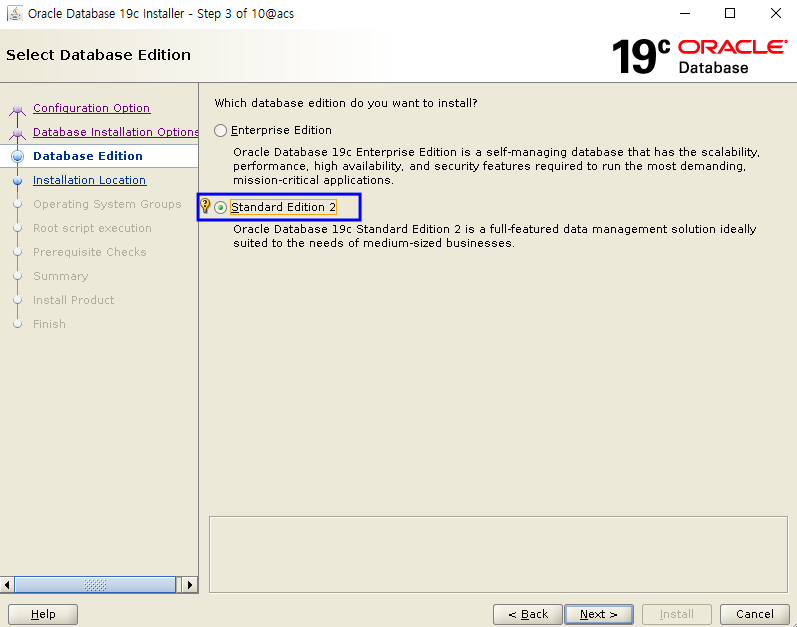
Choose to Oracle Base and Oracle Home and click to Next button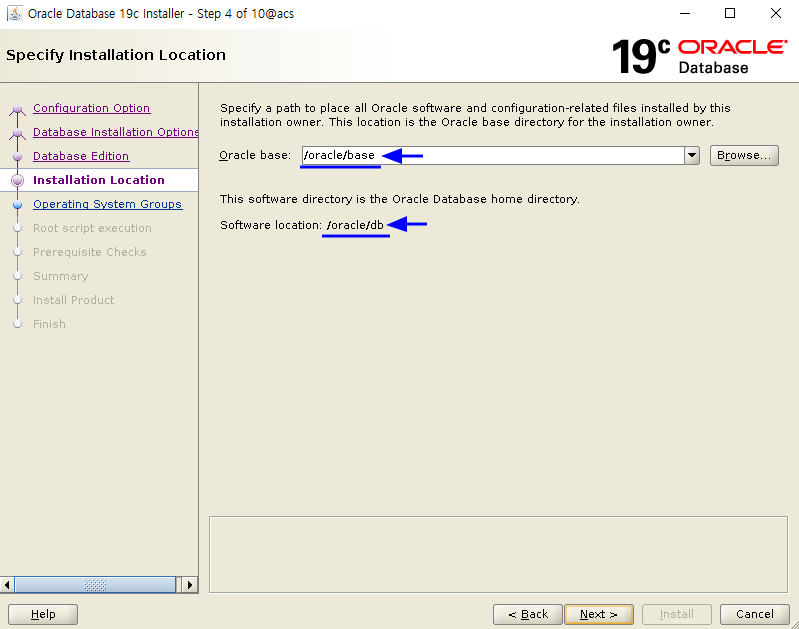
Choose to OS Group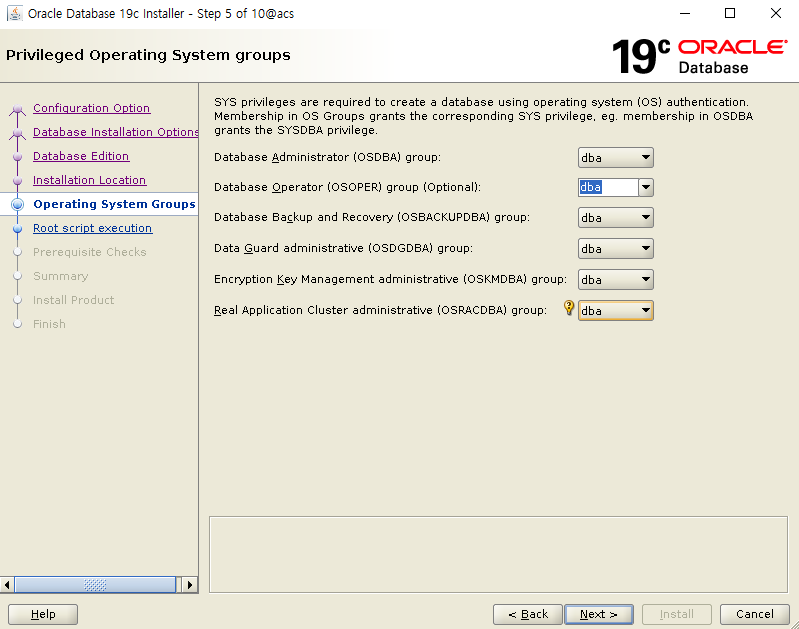
Check Prerequisite and Next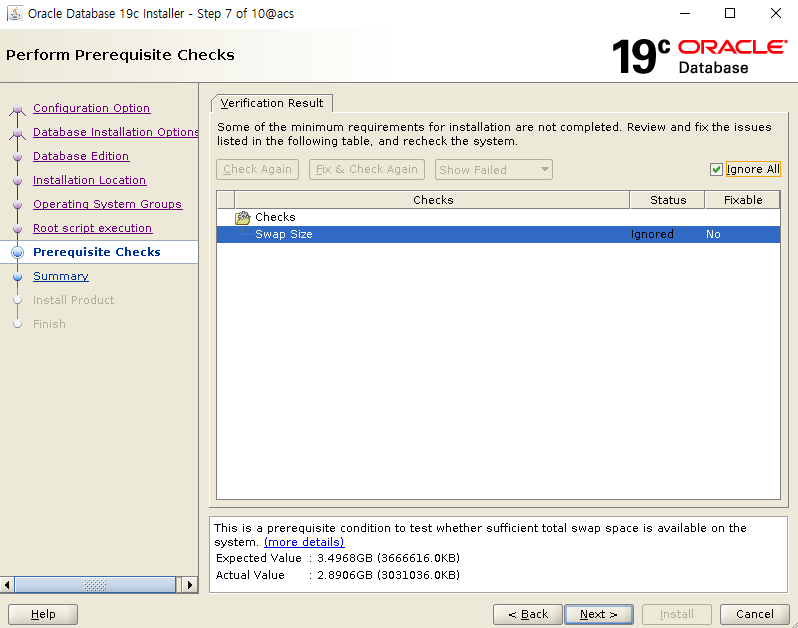
Click the Install botton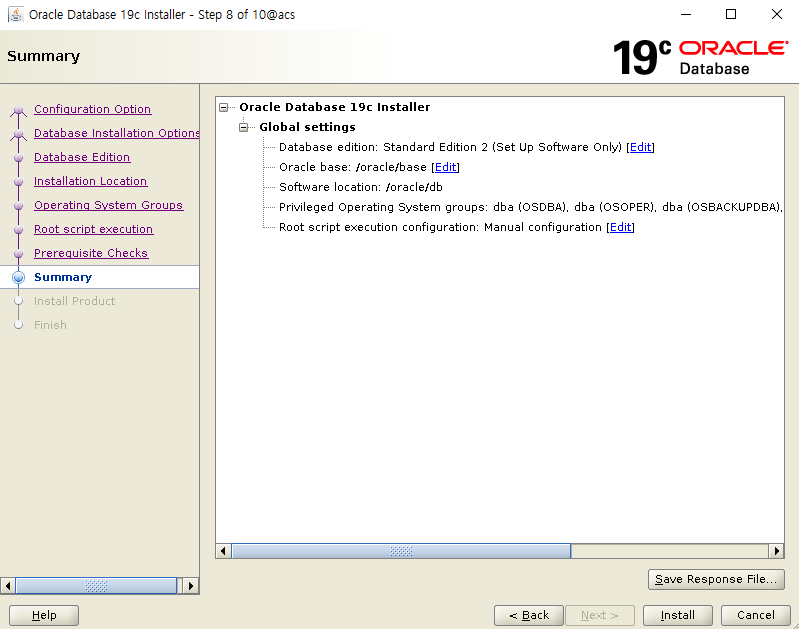
during install...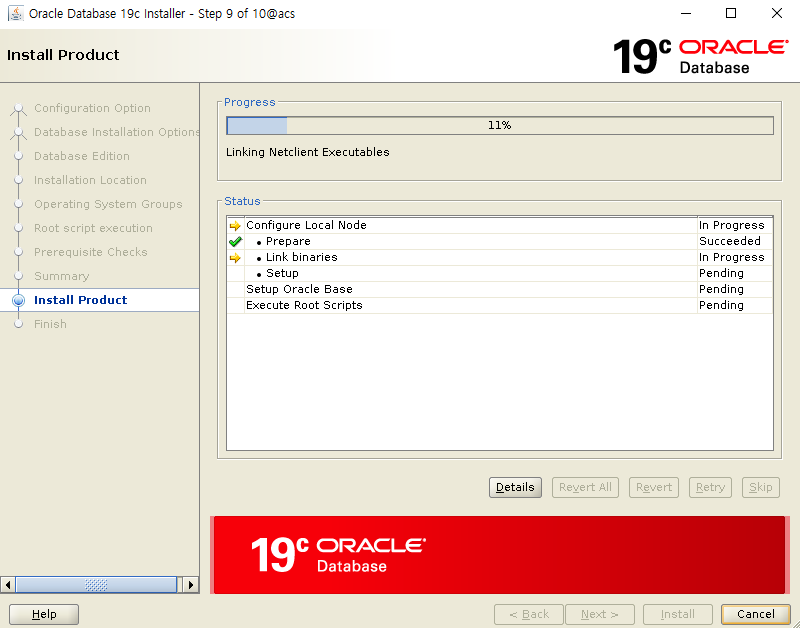
Run root.sh as root user - only node1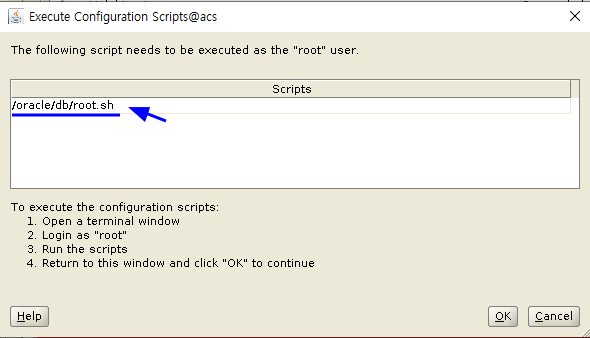
[root@acs db]# ./root.sh
Performing root user operation.
The following environment variables are set as:
ORACLE_OWNER= oracle
ORACLE_HOME= /oracle/db
Close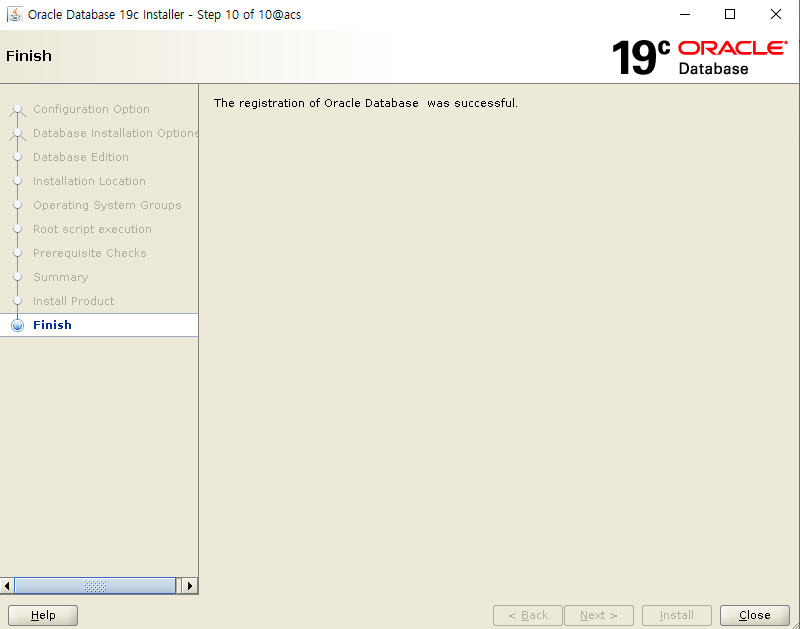
19.9 GRID - Apply RU Patch
# Change OPatch Utility for recently version
- run as root( all nodes )
[root]# echo $GRID_HOME
/oracle/grid
[root]# echo $ORACLE_HOME
/oracle/db
[root]# unzip p6880880_190000_Linux-x86-64.zip
[root]# mv $GRID_HOME/OPatch $GRID_HOME/OPatch.old
[root]# cp -rp OPatch $GRID_HOME
[root]# chown -R oracle:dba $GRID_HOME/OPatch
[root]# echo $ORACLE_HOME
/oracle/db
[root]# mv $ORACLE_HOME/OPatch $ORACLE_HOME/OPatch.old
[root]# cp -rp OPatch $ORACLE_HOME
[root]# chown -R oracle:dba $ORACLE_HOME/OPatch
# OPatch version - run as oracle user
[oracle]# /oracle/grid/OPatch/opatch version
OPatch Version: 12.2.0.1.21
# Apply to ru patch - grid
[root]# cd /oracle/media
[root]# unzip p31750108_190000_Linux-x86-64.zip
[root]# chown -R oracle:dba 31750108
[root]# export GRID_HOME=/oracle/grid
[root]# export ORACLE_HOME=/oracle/db
[root]# export RU_HOME=/oracle/media/31750108
# After completion of Node 1 execution, proceed in order of Node 2 execution
[root]# $GRID_HOME/OPatch/opatchauto apply $RU_HOME -oh $GRID_HOME
# Check applied patch - grid_home - run as oracle
[oracle]$ $GRID_HOME/OPatch/opatch lspatches -oh $GRID_HOME
31780966;TOMCAT RELEASE UPDATE 19.0.0.0.0 (31780966)
31773437;ACFS RELEASE UPDATE 19.9.0.0.0 (31773437)
31772784;OCW RELEASE UPDATE 19.9.0.0.0 (31772784)
31771877;Database Release Update : 19.9.0.0.201020 (31771877)
DB S/W Copy to node 2 and DBCA
Use addnode.sh to copy Oracle Home node1 to node2
# run as oracle
export ORACLE_HOME=/oracle/db
$ORACLE_HOME/addnode/addnode.sh CLUSTER_NEW_NODES=acs2 -silent
WARNING] [INS-13014] Target environment does not meet some optional requirements.
<skip ...>
Prepare Configuration in progress.
Prepare Configuration successful.
.................................................. 7% Done.
<skip ...>
As a root user, execute the following script(s):
1. /oracle/db/root.sh
Execute /oracle/db/root.sh on the following nodes:
[acs2]
Successfully Setup Software with warning(s).
.................................................. 100% Done.
If copy completion, run /oracle/db/root.sh as the root user on node 2
[root]# /oracle/db/root.sh
# Create a DB as the oracle user on node 1
[oracle]$ dbca
Create a database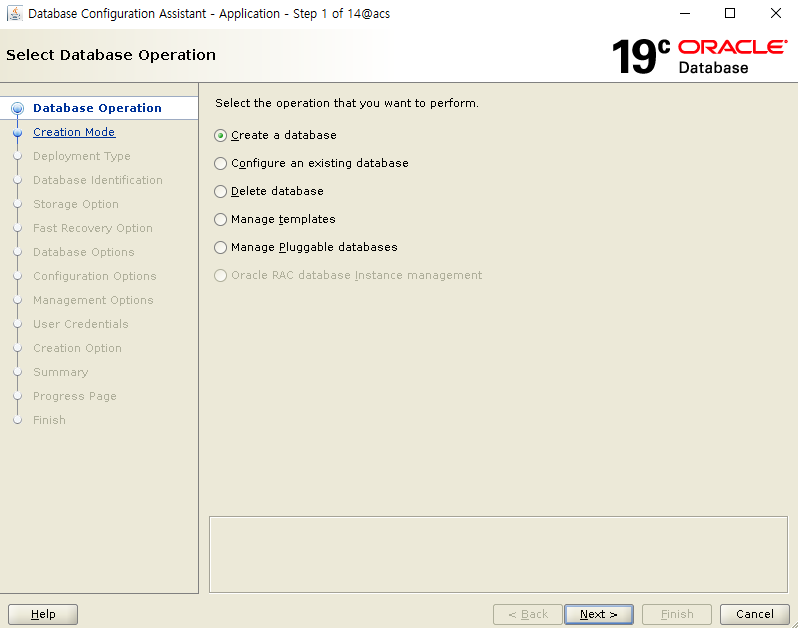
Advanced Configuration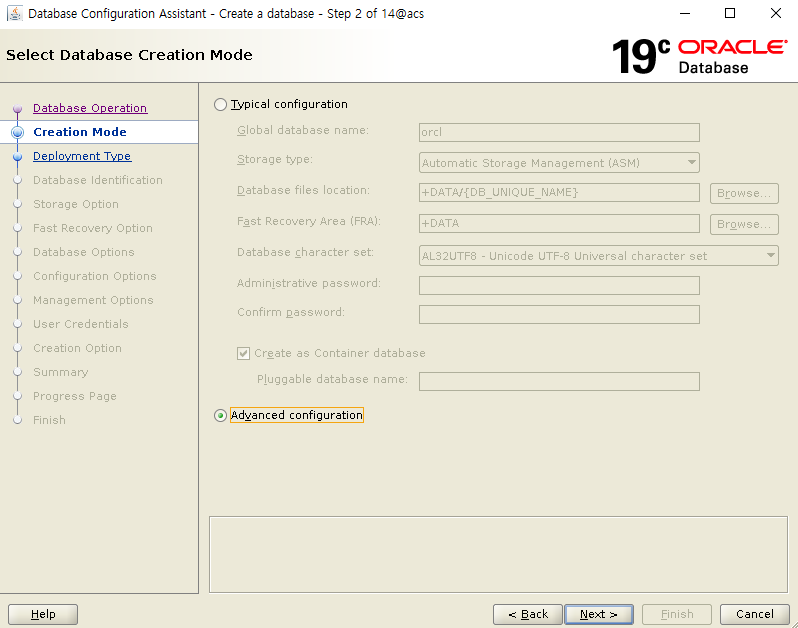
Type is Single Instance / Template is Custom Database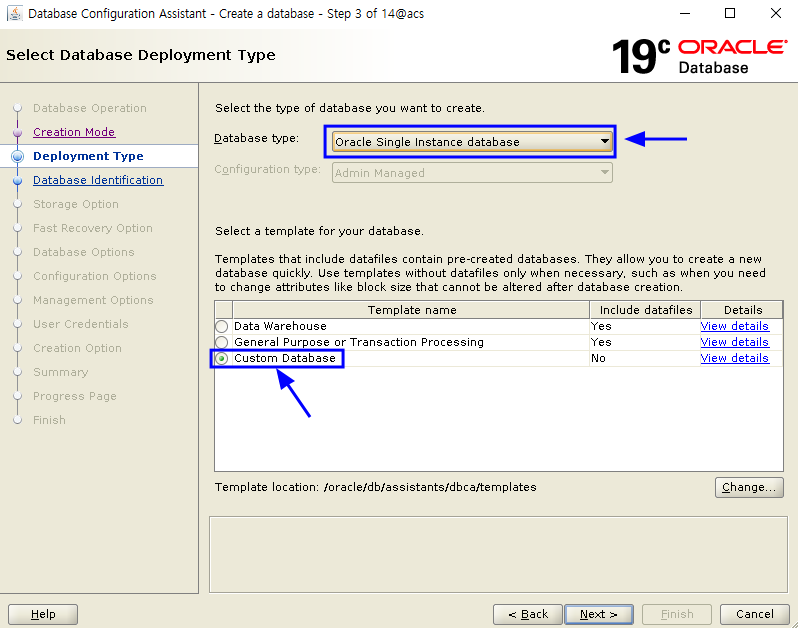
Enter the SID
choose to Use following for... attributes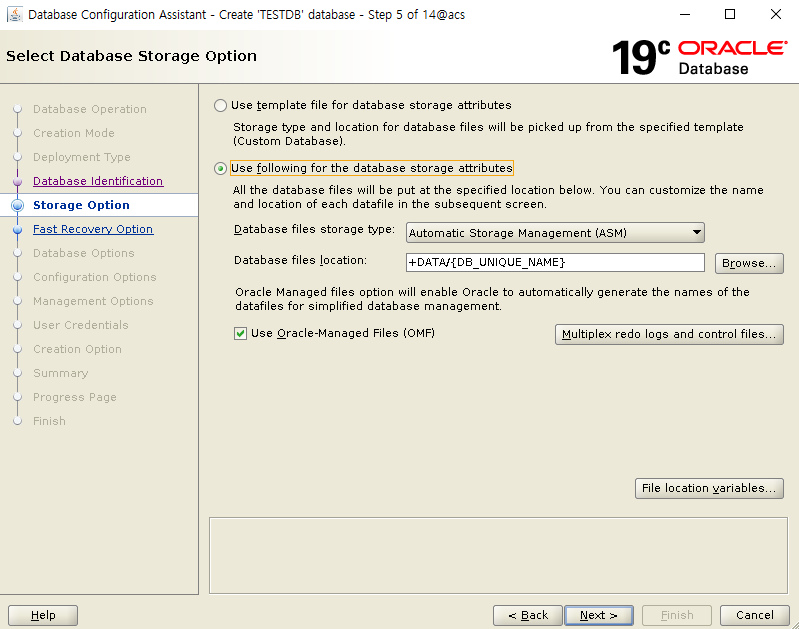
Uncheck the Recovery Area / archivelog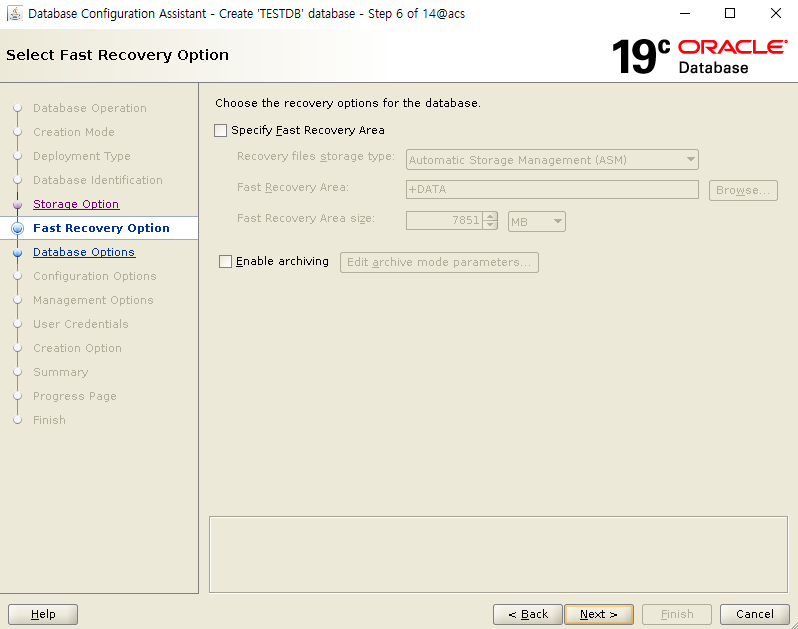
Select the component to use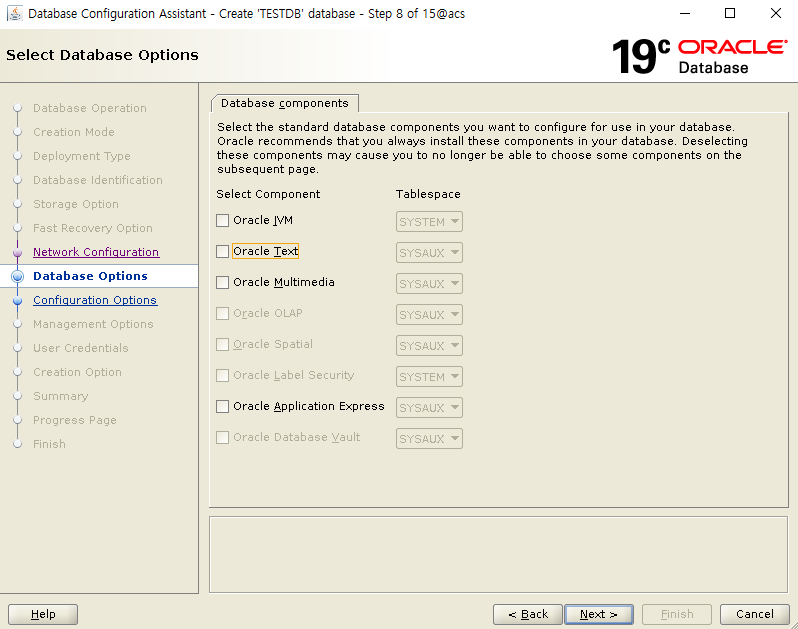
After setting the SGA memory size and character set, click Next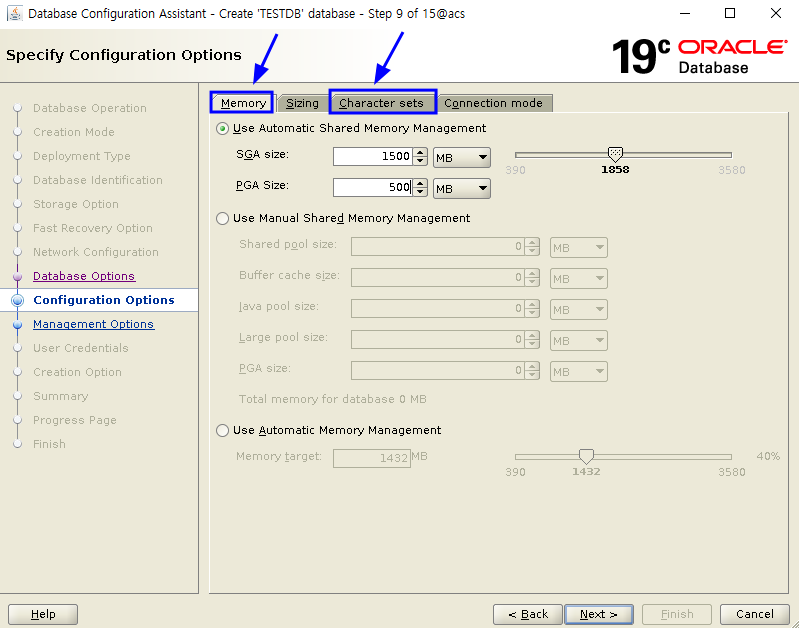
Enter the password
Check the Create database and click Next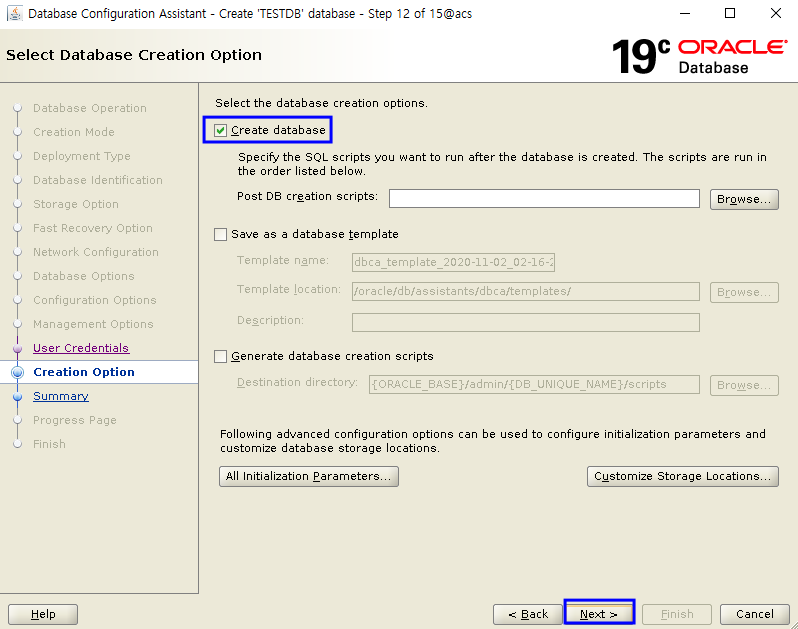
Finish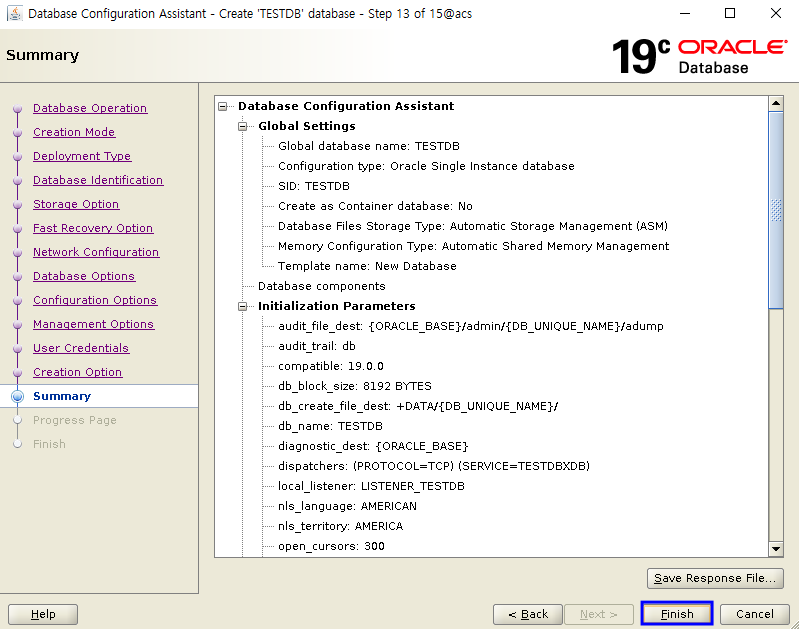
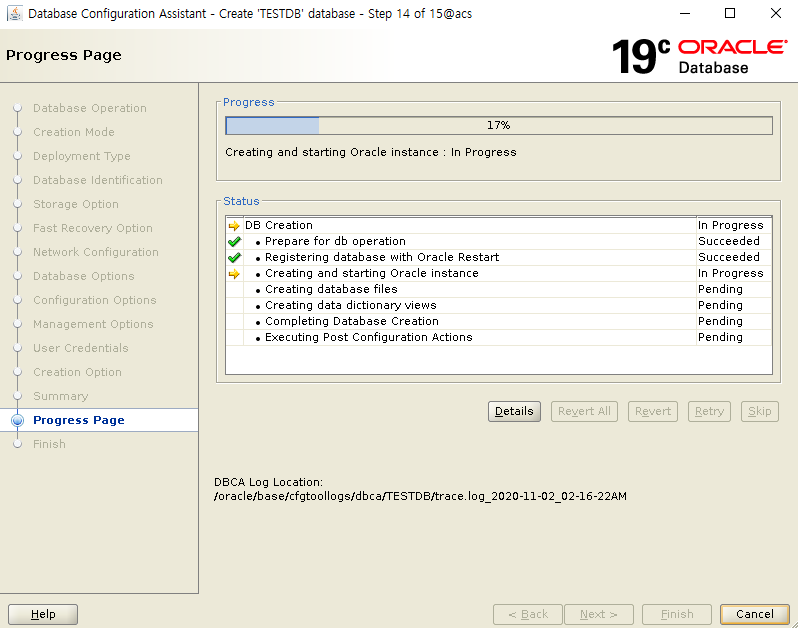
Close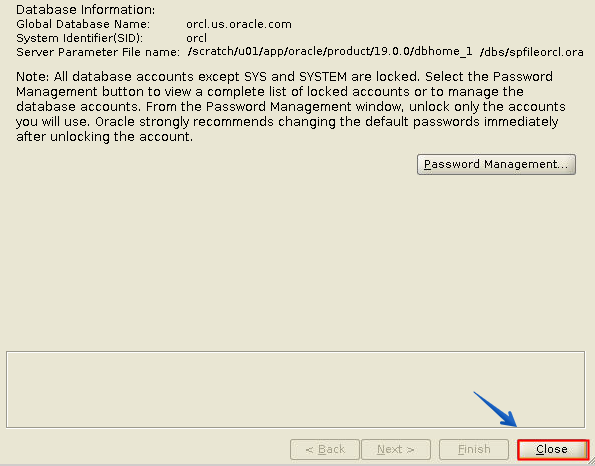
Oracle S/W RU Patch
* Apply environment variables to both root / oracle users
* Apply RU Patch in the order of node 1-> node 2
export GRID_HOME=/oracle/grid
export ORACLE_HOME=/oracle/db
export RU_HOME=/oracle/media/31750108
## run on node 1
# run as root
[root]# $GRID_HOME/crs/install/rootcrs.sh -prepatch
# run as oracle
$RU_HOME/31772784/custom/scripts/prepatch.sh -dbhome $ORACLE_HOME
[oracle]$ [oracle]$ $ORACLE_HOME/OPatch/opatch apply $RU_HOME/31772784 -oh $ORACLE_HOME -local -silent
[oracle]$ $ORACLE_HOME/OPatch/opatch apply $RU_HOME/31771877 -oh $ORACLE_HOME -local -silent
$RU_HOME/31772784/custom/scripts/postpatch.sh -dbhome $ORACLE_HOME
# run as root
[root]# $GRID_HOME/rdbms/install/rootadd_rdbms.sh
[root]# $GRID_HOME/crs/install/rootcrs.sh -postpatch
* After completion of node 1, perform the same procedure on node 2.
# Post Action - run as oracle
Run only once on node1 with started DB
[oracle]$ cd $ORACLE_HOME/OPatch
[oracle]$ ./datapatch -verbose
Modify the srvctl - database
First, check the current configuration
[oracle]$ srvctl config database -db ORCL
Database unique name: ORCL
Database name: ORCL
Oracle home: /oracle/db
Oracle user: oracle
Spfile: +DATA/ORCL/PARAMETERFILE/spfile.266.1055458887
Password file: <-- current is not set password file
<skip...>
Start options: open
<skip...>
Type: SINGLE <-- Singe DB
<skip...>
Database instance: ORCL
Configured nodes: acs <-- Current only one node
Here, will set the orapwd file to be used in the ASM Area
# run as oracle
[oracle]$ . oraenv
ORACLE_SID = [ORCL] ? +ASM1
ORACLE_HOME = [/home/oracle] ? /oracle/grid
The Oracle base has been changed from /oracle to /oracle/base
[oracle]$ asmcmd mkdir +DATA/ORCL/PASSWORD
[oracle]$ asmcmd pwcopy --dbuniquename ORCL
/oracle/db/dbs/orapwORCL +DATA/ORCL/PASSWORD/orapwORCL -f
# modify the properties using srvctl
[oracle]$ srvctl modify database -db ORCL -pwfile +DATA/ORCL/PASSWORD/orapworcl
[oracle]$ srvctl config database -db ORCL
Database unique name: ORCL
Database name: ORCL
Oracle home: /oracle/db
Spfile: +DATA/ORCL/PARAMETERFILE/spfile.266.1055458887
Password file: +DATA/ORCL/PASSWORD/orapworcl <-- Password Added
Disk Groups: DATA
Type: SINGLE
Database instance: ORCL
Configured nodes: acs
# Adding to Node2
[oracle]$ srvctl modify database -db ORCL -node acs,acs2
[oracle]$ srvctl config database -db ORCL
Password file: +DATA/ORCL/PASSWORD/orapworcl
Start options: open
Mount point paths:
Type: SINGLE
Database instance: ORCL
Configured nodes: acs,acs2 <- now 2 nodes
# Create audit directory - on node 2
[oracle]$ mkdir -p /oracle/base/admin/ORCL/adump
-> show parameter audit_file_dest
# copy tnsnames.ora and modify file
= Transfer tnsnames.ora file from node 1 to node 2 through scp
[oracle]$ scp /oracle/db/network/admin/tnsnames.ora \
acs2:/oracle/db/network/admin/
Change the host name to match node2.
For example
vi
:1,$ s/acs/acs2/g
Relocate the database resource
Relocate(migrate) - Node1 to node 2
[oracle]$ srvctl relocate database -d ORCL -n acs2 -w 1 -v
# Command Description
[oracle]$ srvctl relocate database -d DBNAME -n TARGET_HOSTNAME -w 1 -v
-w If you don’t use options, online relocation timeout : 30 minute
The unit is minutes, and this time means the time to terminate the session, migrate instances, and open transactions.
The range is from 1 to 720 minutes.
-v is verbose
[Reference] relocate database - this is a combination of commands
Usage: srvctl relocate database -db <db_unique_name> {[-node <target>] [-timeout <timeout>] [-stopoption <stop_option>] | -abort [-revert]} [-drain_timeout <timeout>] [-verbose]
-db <db_unique_name> Unique name of database to relocate
-node <target> Target node to which to relocate database
-timeout <timeout> Online relocation timeout in minutes (only for RAC One Node database)
-abort Abort failed online relocation (only for RAC One Node database)
-revert Remove target node of failed online relocation request from the candidate server list of administrator-managed RAC One Node database
-stopoption <stop_option> Override default shutdown option for running instance (only NORMAL allowed)
-drain_timeout <drain_timeout> Service drain timeout specified in seconds
-verbose Verbose output
-help Print usage
# if relocate is complete, query the grid state
# any node
[oracle@acs2]$ crsctl stat res -t
ora.orcl.db
1 ONLINE ONLINE acs2 Open,HOME=/oracle/db,STABLE
ora.qosmserver
1 ONLINE ONLINE acs STABLE
ora.scan1.vip
1 ONLINE ONLINE acs STABLE
[oracle@acs2]$ lsnrctl status
LSNRCTL for Linux: Version 19.0.0.0.0 - Production on 03-NOV-2020 01:04:05
Copyright (c) 1991, 2020, Oracle. All rights reserved.
Connecting to (ADDRESS=(PROTOCOL=tcp)(HOST=)(PORT=1521))
STATUS of the LISTENER
------------------------
Alias LISTENER
Version TNSLSNR for Linux: Version 19.0.0.0.0 - Production
Start Date 02-NOV-2020 23:40:20
Uptime 0 days 1 hr. 23 min. 44 sec
Trace Level off
Security ON: Local OS Authentication
SNMP OFF
Listener Parameter File /oracle/grid/network/admin/listener.ora
Listener Log File /oracle/base/diag/tnslsnr/acs2/listener/alert/log.xml
Listening Endpoints Summary...
(DESCRIPTION=(ADDRESS=(PROTOCOL=ipc)(KEY=LISTENER)))
(DESCRIPTION=(ADDRESS=(PROTOCOL=tcp)(HOST=192.168.56.52)(PORT=1521)))
(DESCRIPTION=(ADDRESS=(PROTOCOL=tcp)(HOST=192.168.56.54)(PORT=1521)))
Services Summary...
Service "+ASM" has 1 instance(s).
Instance "+ASM2", status READY, has 1 handler(s) for this service...
Service "+ASM_DATA" has 1 instance(s).
Instance "+ASM2", status READY, has 1 handler(s) for this service...
Service "ORCL" has 1 instance(s).
Instance "ORCL", status READY, has 1 handler(s) for this service...
Service "ORCLXDB" has 1 instance(s).
Instance "ORCL", status READY, has 1 handler(s) for this service...
The command completed successfully
Try changing(relocate) to node 1 again
[oracle@acs]$ srvctl relocate database -d ORCL -n acs -w 1 -v
[oracle@acs]$ crsctl stat res -t
ora.orcl.db 1 ONLINE ONLINE acs Open,HOME=/oracle/db,STABLE
ora.qosmserver 1 ONLINE ONLINE acs STABLE
ora.scan1.vip 1 ONLINE ONLINE acs STABLE
[oracle@acs:/home/oracle]$ lsnrctl status
LSNRCTL for Linux: Version 19.0.0.0.0 - Production on 03-NOV-2020 01:02:24
Copyright (c) 1991, 2020, Oracle. All rights reserved.
Connecting to (ADDRESS=(PROTOCOL=tcp)(HOST=)(PORT=1521))
STATUS of the LISTENER
------------------------
Alias LISTENER
Version TNSLSNR for Linux: Version 19.0.0.0.0 - Production
Start Date 02-NOV-2020 23:28:49
Uptime 0 days 1 hr. 33 min. 35 sec
Trace Level off
Security ON: Local OS Authentication
SNMP OFF
Listener Parameter File /oracle/grid/network/admin/listener.ora
Listener Log File /oracle/base/diag/tnslsnr/acs/listener/alert/log.xml
Listening Endpoints Summary...
(DESCRIPTION=(ADDRESS=(PROTOCOL=ipc)(KEY=LISTENER)))
(DESCRIPTION=(ADDRESS=(PROTOCOL=tcp)(HOST=192.168.56.51)(PORT=1521)))
(DESCRIPTION=(ADDRESS=(PROTOCOL=tcp)(HOST=192.168.56.53)(PORT=1521)))
Services Summary...
Service "+ASM" has 1 instance(s).
Instance "+ASM1", status READY, has 1 handler(s) for this service...
Service "+ASM_DATA" has 1 instance(s).
Instance "+ASM1", status READY, has 1 handler(s) for this service...
Service "ORCL" has 1 instance(s).
Instance "ORCL", status READY, has 1 handler(s) for this service...
Service "ORCLXDB" has 1 instance(s).
Instance "ORCL", status READY, has 1 handler(s) for this service...
The command completed successfully
Conclusion
With the release of Oracle 19c, the RAC function in the Standard Edition that was previously supported during the change has been removed.
Accordingly, the system that was using SE RAC should select EE RAC while upgrading 19c, or select SE Single or HA or etc..
I think that the reason why this function came out about 9 years after the 11gR2 RAC ONE NODE was released may be that SE RAC is not provided in 19c. It may not be a 100% alternative to the existing SE RAC, but one that can be considered.
Test - Failover Speed
# When the shutdown completed at node 2
2020-11-03T01:20:55.742712+09:00
Instance shutdown complete (OS id: 8882)
# When the begin starting at node 1
2020-11-03T01:20:57.383659+09:00
Starting ORACLE instance (normal) (OS id: 18539)
=> It turns out to take less than about 2 seconds and may be faster depending on system performance
The same (similar to RAC ONE NODE), SEHA has a contents that can be used for 10 days a year for Spare Server
Original : Standard Edition High Availability databases can be licensed using the “10-day failover rule”, which is described in this document. This rule includes the right to run the licensed program(s) [here the Standard Edition High Availability database] on an unlicensed spare computer in a failover environment for up to a total of ten separate days in any given calendar year.
It means that the Failover rule is provided for 10 days per year on the spare server without a license
* For additional information, please check the link below.
In the case of RAC ONE NODE, which was introduced in 11gR2 before, it was i say mentioned that there are many better parts than using vendor cluster or 3rd party cluster in using HA method.
In the case of this SEHA, as the function of SE has been officially added, it would be good to consider the function when using HA in SE.
Even before SEHA came out, examples of using a resource in the form of HA by registering a resource in the Grid using Custom Shell regardless of EE/SE existed.
You may think that such a function has been officially added.
Reference
Reference link
https://blogs.oracle.com/maa/standard-edition-high-availability-officially-released
https://docs.oracle.com/en/database/oracle/oracle-database/19/newft/new-features.html#GUID-E5D12323-B950-4137-8544-730323D62114
https://gotodba.com/2020/09/02/seha-standard-edition-high-availability-in-oracle-db
Relate Post : 11gR2 New Feature - RAC ONE NODE - English translation is required.

Principal DBA(MySQL, AWS Aurora, Oracle)
핀테크 서비스인 핀다에서 데이터베이스를 운영하고 있어요(at finda.co.kr)
Previous - 당근마켓, 위메프, Oracle Korea ACS / Fedora Kor UserGroup 운영중
Database 외에도 NoSQL , Linux , Python, Cloud, Http/PHP CGI 등에도 관심이 있습니다
purityboy83@gmail.com / admin@hoing.io